Fix Shoulder Impingement FAST: 2 Simple Tests + 3 Game-Changing Exercises
Does that sharp pinch in the front of your shoulder make you wonder, “Is today the day it finally blows up?” every time you unrack the bar? If your answer is yes, you’re one of thousands of lifters who experience shoulder impingement. Shoulder impingement can turn every pressing session into a gamble with pain.
Here’s the good news: it isn’t a death sentence for your training. The problem isn’t just happening at your shoulder – it’s a chain reaction involving five interconnected areas that most people completely ignore.
Today, you’ll discover precisely how to break this cycle with two diagnostic tests and three targeted exercises that create lasting relief – not just temporary band-aid solutions.
Quick Reference Guide
Total Time: 10 Minutes
Targets: Shoulder joint, shoulder blade mechanics, rotator cuff stabilization
Goals: Create joint space, retrain movement patterns, and integrate stability under load
Test If Shoulder Impingement Is Your Problem
Before you begin any of the exercises, run the two simple tests below to confirm whether you’re dealing with shoulder impingement.
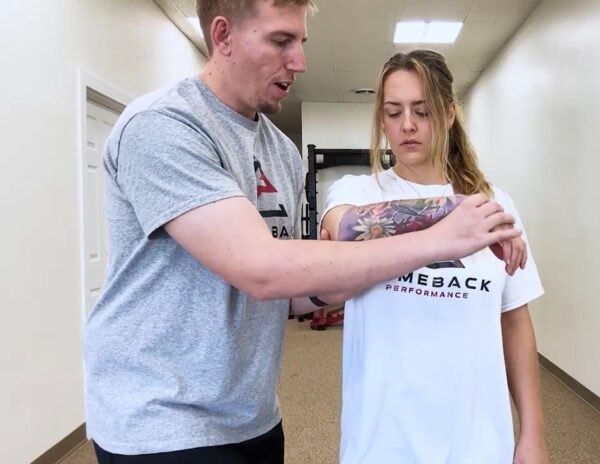
Test 1: Cross-Body Clearing Test
Purpose: Identifies classic impingement mechanics in the front of your shoulder.
How to Do It
- Bring your painful side hand to your opposite shoulder.
- From there, lift your elbow toward your face.
- Pay attention to any sharp or pinching pain in the front of your shoulder.
- If you experience sharp pain when you lift your elbow, that’s a positive sign of shoulder impingement.
Test 2: Hawkins-Kennedy Test
Purpose: Tests for impingement during internal rotation movement patterns.
How to Do It
- Bring your arm straight out in front of you at shoulder height.
- Bend your elbow to 90 degrees with your forearm pointing toward the floor.
- Gently push your wrist down to rotate your forearm toward the ground.
- A positive test means pinching or sharp pain in the front of your shoulder.
If one or both tests light you up, keep reading – these exercises will change how your shoulder moves, so these positions stop jamming everything together.
Now, here are the exercises.
Exercise 1: Banded Posterior Shoulder Mobilization
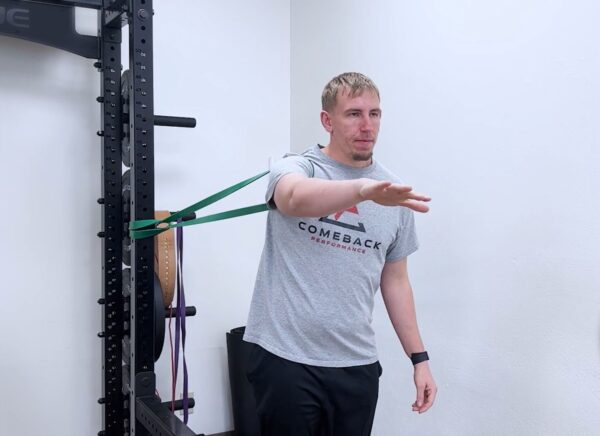
Purpose: Creates space in the front of the joint, especially if you feel jammed at the bottom of the bench or when pressing.
Equipment Needed: Thick resistance band, anchor point at shoulder height.
How to Do It
- Anchor the band at shoulder height and slip it higher on the front of your shoulder.
- Step out until there’s steady tension pulling your shoulder back into the socket.
- Gently move in and out of a light chest press position.
- Let the band do the work – stay relaxed through the front of your shoulder.
Sets: 2 sets of 12-15 gentle reps before pressing sessions.
Tip: Do this before your pressing days so the joint isn’t jammed when you grab the bar. You’re not muscling it – let the band create the space.
Exercise 2: Banded Scap Angels
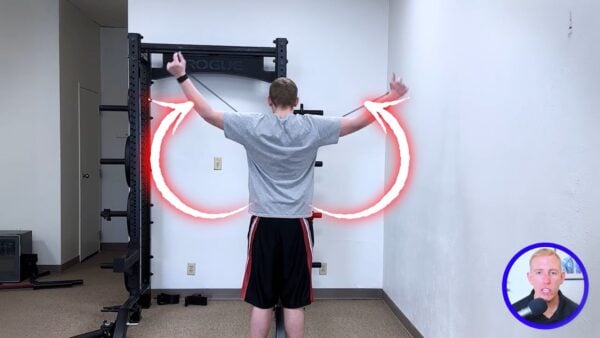
Purpose: Retrains your shoulder blade to move up and around instead of locking down and jamming the rotator cuff and bursa.
Equipment Needed: Resistance band, anchor point at chest height.
How to Do It
- Anchor the band in front of you at chest height and grab it with both hands, keeping your elbows straight.
- Pull the band back and bring your hands toward your pockets.
- Slowly move your arms out to the side into a wide position, ending with your biceps near your ears.
- Return with control to the starting position.
Sets: 2 sets of 8-10 slow, controlled reps.
Tip: Focus on your shoulder blades tipping back and rotating up as your arms rise. Don’t shrug your shoulders into your ears – keep your neck relaxed.
Exercise 3: Banded Bear Sliders
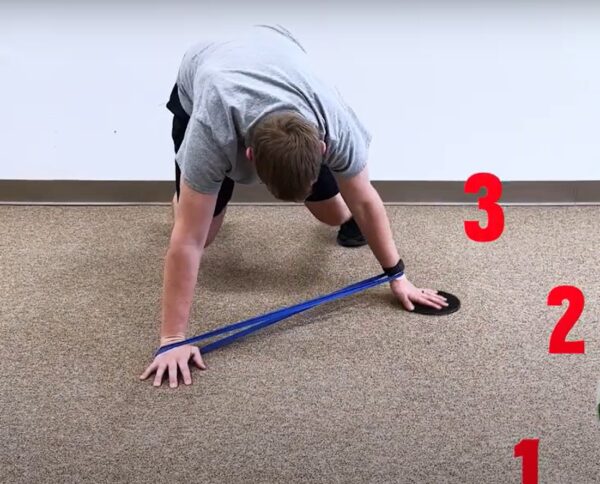
Purpose: Integrates shoulder blade and shoulder control in a weight-bearing position that transfers directly to pressing and pushing movements.
Equipment Needed: Light resistance band.
How to Do It
- Put a light band around your wrists and get into a quadrupod position.
- Lift your knees 1-2 inches off the ground into a bear position.
- Slide your hands forward, out to the side, back, and diagonally.
- Keep your torso as still as possible with no big hip sways.
Sets: 1-2 sets of 5 slow reps in all three directions (if tolerated).
Tip: Feel your shoulder blade and rotator cuff working to stabilize as you move your hands. This teaches your whole system to work together.
Retest and Track Your Progress
After completing these exercises, rerun both diagnostic tests that you did earlier.
- Cross-body test.
- Hawkins-Kennedy test.
Look for these positive changes
- Is the pinch smaller or less intense?
- Does the pain happen later in the motion?
- Do these positions feel less threatening?
Even a small change after one round proves you’re on the right track. You’re changing the mechanics of your joint space and shoulder blade movement, not just temporarily stretching tight muscles.
Your Path to Pain-Free Pressing
In all seriousness, if you practice these three exercises daily and consistently, you can eliminate shoulder impingement and return to pressing heavy without the constant fear of reinjury. We’ve helped many lifters go from barely handling 135 lbs without pain to confidently lifting 300s. We achieved this by fixing the underlying system causing the shoulder pain. If you’re ready, book a session below and speak with a professional!


")