The 5-Minute Warm-Up That Changed Everything for Lifters Over 40
If you’re over 40 and your shoulders scream in protest every time you hit the bench press or attempt dips, you should read this blog to the end. That sharp, catching pain at the bottom of pressing movements means your warm-up game needs an upgrade.
When that familiar ache strikes at the bottom of your bench press or during dips, it’s actually your body’s way of telling you that multiple systems have gotten tight, lazy, and disconnected over the years.
You don’t need to accept this as your new reality, especially when we’ve got these exercises you can do to experience pain-free pressing.
Quick Reference Box
- Total Time: 5 Minutes.
- Targets: Posterior shoulder, lats, shoulder joint, extension range.
- Goals: Pain reduction, improved mobility, safer pressing mechanics.
Before starting the warm-up routine, let’s assess if you even have the shoulder extension needed for safe pressing.
The Essential Shoulder Extension Test
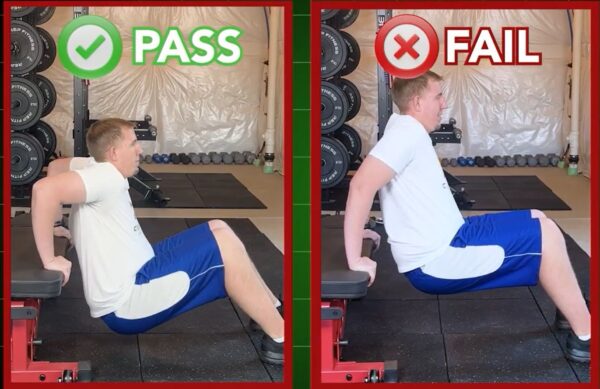
- Start by sitting on the edge of a bench or sturdy chair.
- Place your hands behind you on the surface, fingers pointing away.
- Walk your feet out slightly and scoot your hips forward.
- Lower down slowly, like performing a bench dip.
Ask yourself: Can you comfortably get your elbows to about 90 degrees without sharp front shoulder pain?
If you can’t reach 90 degrees pain-free, you’re missing 60-70 degrees of the shoulder extension you need for safe dips and deep pressing. This limitation is exactly why the bottom of the bench press and push-ups aggravate your shoulders.
Exercise 1 – Banded Posterior Mobilizations
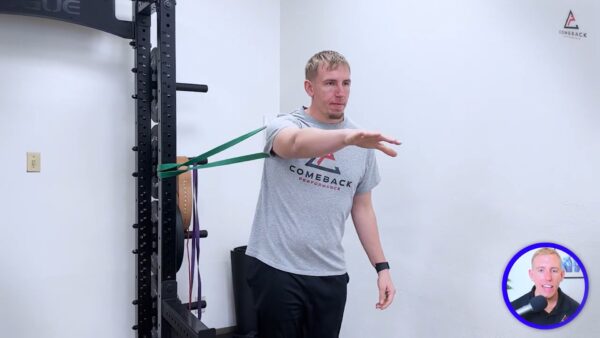
Purpose – To create space in your shoulder joint for extension and internal rotation while reducing front shoulder strain.
Equipment Needed: Resistance band/anchor point
How to Do It
- Attach the band at shoulder height and face away from the anchor point.
- Place the band around the front of your shoulder close to your armpit.
- Step forward to create tension – the band should pull your shoulder back.
- Gently move your arm in and out of a chest press position, letting the band guide your shoulder backward.
Sets: Do 30 seconds each side.
Tip: If your front shoulder spikes into red zone pain, make the motion smaller or reduce the tension.
Exercise 2: Bench Opener

Purpose – Free up your lats and front shoulders so you’re not fighting chronic tightness at the bottom of pressing movements.
Equipment Needed: Bench or sturdy elevated surface.
How to Do It
- Kneel facing the bench with elbows placed on the surface.
- Keep your hands together or hold a small dowel.
- Slowly sit your hips back and let your chest drop toward the floor.
- Hold the stretch for a few seconds, focusing on the chest dropping between the arms.
Sets: Do 10 slow reps, holding 2-3 seconds at bottom.
Tip: Stop before any sharp pain occurs.
Exercise 3: Crab Rocks
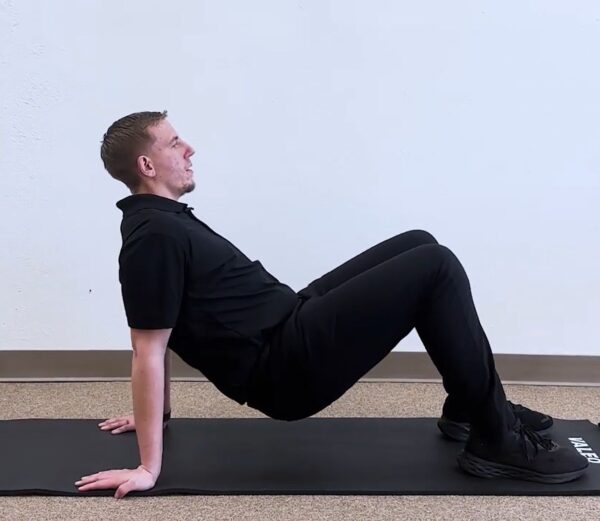
Purpose: Builds closed-chain stability in a dip-like position with a manageable load to teach your shoulders to accept weight behind your body.
Equipment Needed: None
How to Do It
- Sit on the floor with knees bent, feet flat.
- Place your hands slightly behind you with fingers pointing away or slightly out.
- Lift hips just off the ground and gently rock the weight forward and back through the shoulders.
- Keep shoulders away from ears – no shrugging allowed.
Sets – 1 minute of controlled rocking.
Tip: Stay low – this isn’t a full crab walk. You’re teaching controlled load acceptance behind your body, like a shallow, safe version of dips.
Exercise 4: Prone Extension Lift-offs
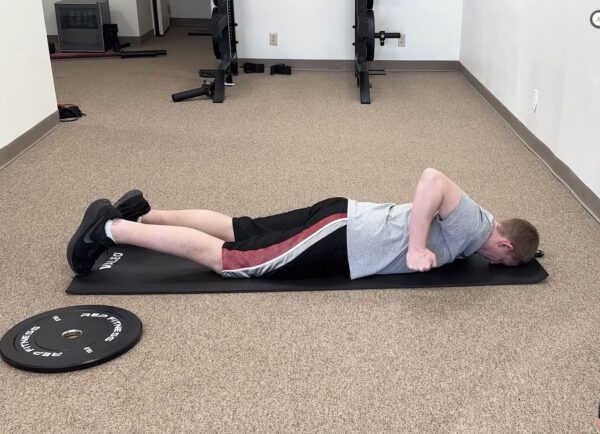
Purpose: Strengthen the end-range shoulder extension you need for pain-free bottom positions in pressing exercises.
Equipment Needed: None
How to Do It
- Lie face down with elbow bent to 90 degrees, hand beside ribs.
- Gently lift the elbow and hand toward the ceiling, bringing the shoulder into extension.
- Hold for 3 seconds, then lower with control.
- Focus on the back of your shoulders, not your neck.
Sets: 8-10 reps each side.
Tip: Don’t jam into pain – only go to the point where you can hold without red zone symptoms. This builds both mobility and strength for safer pressing.
Exercise 5: Banded Bench Patterning
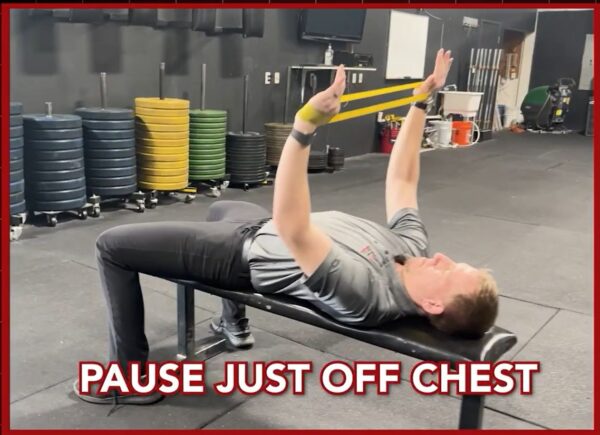
Purpose: Grooves better bench pressing mechanics with your nervous system before adding real weight to the bar.
Equipment Needed: Light resistance band
How to Do It
- Loop the light band around your wrists and lie on your back in bench press position.
- Create tension by pulling hands apart throughout the movement.
- Lower elbows to 45 degrees from torso – not straight out to sides.
- Pause lightly on the chest, then press back up with smooth control.
Sets: 10-12 controlled reps.
Tip: Keep elbows at 30-45 degrees from your sides, not flared straight out. If you feel that familiar front shoulder bite, shorten the range for now.
Real Results: Back to Dips After Years of Pain
One client with chronic bicep and front shoulder pain hadn’t been able to do dips for years. After rebuilding his extension and shoulder position with these same exercises, he told us:
“I could finally do dips. I was never able to do dips for years. To be able to do dips where I wasn’t able to do it before… it tells me I’m moving in the right direction.”
This is the power of addressing your movement system, not just isolated muscles.
How to Use This 5-Minute Warm-Up
Before every push day – whether you’re doing bench press, push-ups, or working toward dips – run through this complete sequence:
- Banded posterior mobilizations → Better joint position
- Bench openers → Free up lats and front shoulders
- Crab rocks → Build closed-chain stability
- Prone extension lift-offs → Strengthen end-range extension
- Banded bench patterning → Groove better pressing mechanics
Take the Next Step
If you’re returning from bicep tendonitis or chronic front shoulder pain, commit to this warm-up for 4-6 weeks minimum. This 5-minute warm-up addresses the mechanical side of shoulder pain, but if you want to identify which specific parts of your Big Five system are holding you back, you need a more comprehensive approach.
Ready to eliminate shoulder flare-ups permanently and get back to the lifting you love?


")