3 Simple Tests to Identify Your Shoulder Pain Type (+ 2 Exercises That Fix It)
Most people over 40 who are experiencing front shoulder discomfort during bench press, dips, or overhead movements have likely been given multiple labels: bicep tendinitis, rotator cuff impingement, or shoulder impingement syndrome.
It’ll interest you to know that shoulder pain isn’t just about one isolated structure. Your discomfort exists within what experts call the “Big Five” system. This is an interconnected network where your neck, upper back, shoulder blade, rotator cuff, and bicep tendon all influence each other. When one component fails, it creates a chain reaction that affects everything else.
Here are 2 targeted exercises and 3 tests you can do to fix that.
Quick Reference Box
- Total Time: 10 Minutes
- Targets: Bicep tendon, rotator cuff, shoulder blade system
- Goals: Pain identification, immediate relief, improved shoulder mechanics.
Exercise Breakdown
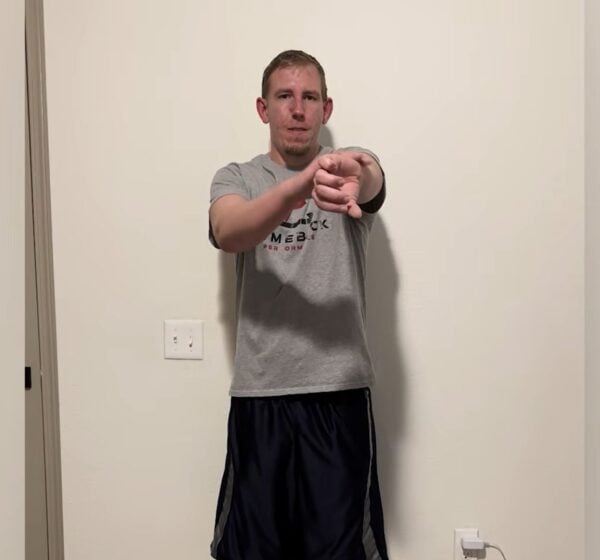
Test 1 – Speed’s Test (Bicep-Dominant Pain)

Purpose: Identifies if your pain originates primarily from the bicep tendon
Equipment Needed: None
How to Do It
- Stand tall and raise your painful arm straight out in front to shoulder height.
- Keep your elbow completely straight throughout the test.
- Use your other hand to press straight down on your wrist while you resist upward.
- Hold for 5-10 seconds and assess your pain response.
What to Look For: Sharp or familiar pain at the front of your shoulder or top of your bicep that recreates your bench press or dip pain.
Tip: This should feel like the exact pain you experience during pressing movements – if it doesn’t match, your issue likely isn’t bicep-dominant.
Test 2 – Empty Can Test (Rotator Cuff/Impingement-Dominant)
Purpose: Evaluates the supraspinatus muscle and identifies impingement patterns
Equipment Needed: None
How to Do It:
- Stand with arms at your sides, then raise your arm to shoulder height.
- Point your thumb downward like you’re emptying a can.
- Gently push upward with that arm while your other hand presses down at the wrist.
- Maintain the thumb-down position throughout the test.
What to Look For: Sharp pinch or deep ache at the top or side of your shoulder, plus obvious weakness compared to your unaffected side.
Tip: Focus on the quality of pain, not just intensity.
Test 3: Gerber Lift-Off (System Integration Problem)
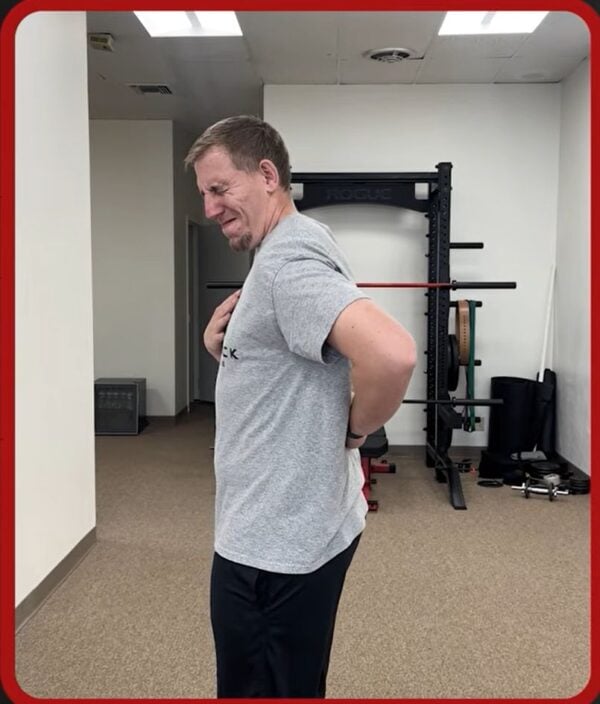
Purpose: Assesses the subscapularis and identifies whole-system dysfunction.
Equipment Needed – None
How to Do It
- Stand tall and place the back of your hand on your lower back, palm facing away.
- Keep your elbow bent and gently try to lift your hand away from your back.
- Activate your shoulder muscles without using momentum or compensatory movements.
- Compare the strength and range of motion to your unaffected side.
What to Look For: Pain or a strong stretch in the front of your shoulder, deep in the joint, or along the inside of your shoulder blade, plus significant weakness.
Tip: If this test is positive along with one or both others, you’re dealing with a complex system problem that requires comprehensive treatment.
The Exercises
Exercise 1: Wall Slides

Purpose: Restore proper shoulder blade and joint coordination for both bicep and rotator cuff issues.
Equipment Needed: Wall
How to Do It
- Stand facing a wall with one foot slightly placed forward for stability.
- Place your forearms or hands on the wall at shoulder height.
- Gently press into the wall and slowly slide your arms upward.
- Allow your chest to move slightly toward the wall as you slide up.
Sets: 2-3 sets of 10-12 repetitions.
Tip: Only go as high as you can without sharp pinching – don’t arch your lower back to chase range of motion.
Exercise 2 – Banded Bear Sliders
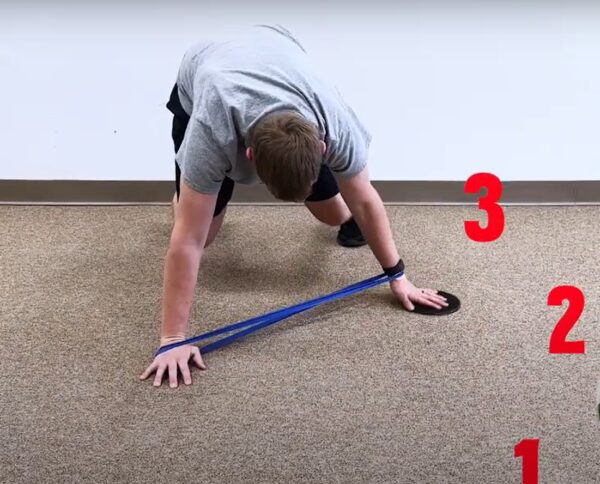
Purpose: Build shoulder stability and control in a joint-friendly position.
Equipment Needed: Resistance band, furniture sliders or paper plates.
How to Do It
- Get on hands and knees with hands under shoulders, knees under hips.
- Loop a resistance band around your wrists with light tension.
- Lift your knees 1-2 inches off the ground into a bear crawl position.
- Slide one hand out in different directions while maintaining the position.
Sets: 30-45 seconds, rest, then repeat 2-3 times.
Tip: Focus on pushing the floor away with your planted hand – this is about control, not distance.
Stop Guessing, Start Working It Out
The reality for lifters over 40 is that imaging often shows “abnormalities” like tendon irritation or minor rotator cuff changes. The question isn’t whether you have a perfect shoulder – it’s identifying what’s driving your pain most and addressing it systematically. These tests give you that clarity, and when combined with the two exercises above, you can start addressing your shoulder pain immediately while building the foundation for long-term health.


")