
Frozen Shoulder or Just Stiff? 3 Simple Tests to Know the Difference (+ Relief Exercises)
If you’ve been told you might have frozen shoulder or your shoulder feels painfully stiff and stuck, you’re not alone. A lot of people get labeled with “frozen shoulder” when what they actually have is a stiff, guarded shoulder that can absolutely improve with the right exercises.
True frozen shoulder (adhesive capsulitis) affects your entire shoulder capsule, creating a brick wall of restriction in all directions. In just a few minutes, you’ll learn three simple checks to determine if your shoulder is truly frozen or just stiff—and more importantly, what to do about it.
Quick Reference Box
- Total Time: 10-15 Minutes
- Targets: Shoulder joint, shoulder blade, upper back, and surrounding muscles.
- Goals: Assess shoulder condition, reduce pain and stiffness, and restore functional movement patterns.
Relief Exercises for Stiff Shoulders
Exercise 1: Banded Inferior Mobilization + Dowel Elevation
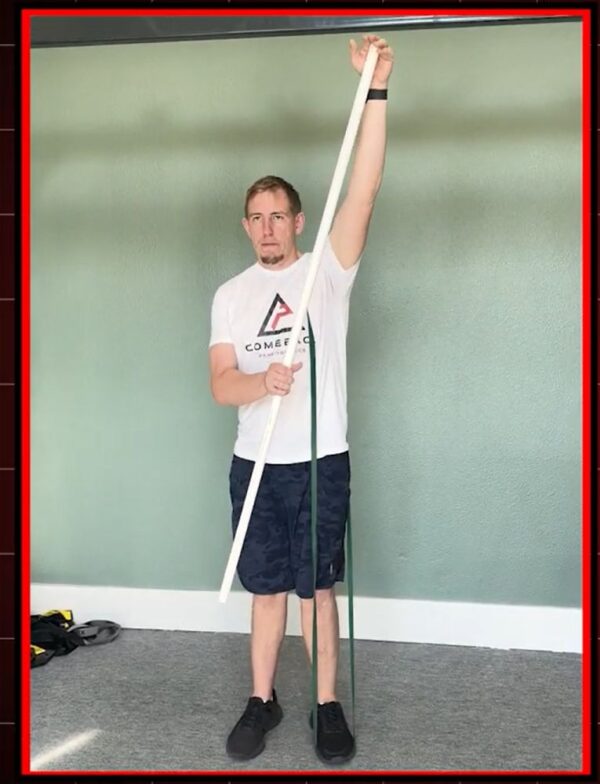
Purpose: Mobilize the shoulder capsule while guiding safe overhead movement
Equipment Needed: Resistance band, dowel/broomstick
How to Do It
- Loop the band around the upper arm just below the shoulder, and step on the other end.
- Hold the dowel in front with both hands, letting the band create a gentle downward pull.
- Slowly use the dowel to guide your arm up to a comfortable overhead position.
- Return to the start position with control.
Sets: 2-3 sets of 8-10 reps.
Tip: The band should feel like it’s giving your shoulder more room as you elevate—stay in comfortable ranges only.
Exercise 2: Bench Opener

Purpose: Free up your upper back so your shoulder doesn’t have to compensate.
Equipment Needed: Bench or sturdy chair, stick/PVC pipe.
How to Do It
- Kneel in front of the bench, hold the stick with palms up at shoulder width.
- Place your elbows on the bench, sit with your hips back.
- Gently drop your chest toward the floor, letting the head come between the arms.
- Hold for a breath or two, then return.
Sets: 2 sets of 8-10 slow reps.
Tip: You should feel a stretch through the upper back and lats, not a sharp jab in the front of the shoulder.
Exercise 3: Wall Slides

Purpose: Train the shoulder blade and joint in a controlled overhead pattern
Equipment Needed: Wall
How to Do It
- Stand facing the wall with one foot slightly forward for balance.
- Place the sides of your hands on the wall at shoulder height.
- Gently press into the wall and slide arms upward while letting the chest move toward the wall.
- Only go as high as comfortable, then slide back down.
Sets: 2-3 sets of 10-12 reps.
Tip: Focus on feeling your shoulder blades moving up and around, not just cranking the arm up.
The 3-Test Assessment
Test 1: Active vs. Assisted Elevation
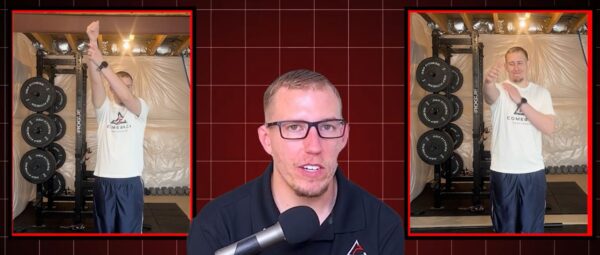
Purpose: Determine if your shoulder limitation is structural (frozen) or functional (stiff/guarded)
Equipment Needed: None
How to Do It
- Raise your painful arm forward as high as you can on your own (active movement).
- Use your other hand to grab the wrist or forearm and help lift it higher (assisted movement).
- Repeat the same test, raising your arm out to the side.
- Compare how much higher the assisted movement is than the active one.
What to Look For
- If assisted movement goes significantly higher = likely a stiff/guarded shoulder.
- And if both stop at the same point with a hard block = likely a frozen shoulder.
Tip: The key with true frozen shoulder is that even with help, it will not go further—like hitting a brick wall.
Test 2: End-Feel Assessment
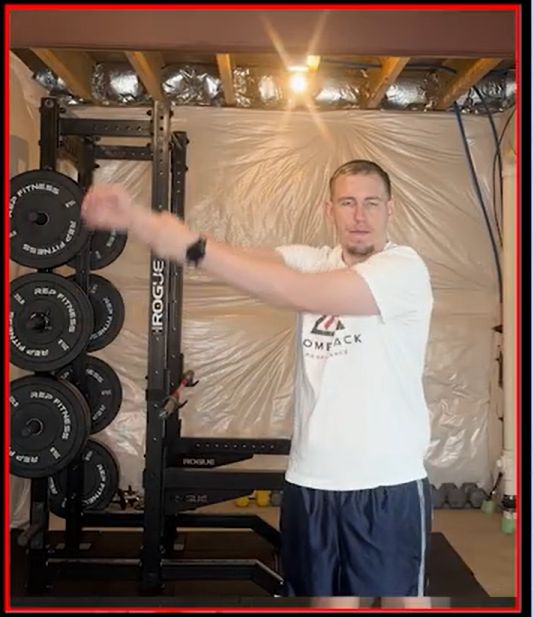
Purpose: Distinguish between a hard capsular restriction and muscle guarding.
Equipment Needed: None.
How to Do It
- At the top of your active and assisted movements, pay attention to how the restriction feels.
- Try to breathe deeply and relax into the end position.
- Notice if you can “sneak” a little further with relaxation.
What to Look For
- Brick wall/hard block that won’t budge = more frozen.
- Stretchy, pinchy, or guarded feeling that gives slightly = more stiff mechanics.
Tip: Most people can intuitively tell the difference between “my shoulder is literally stuck” versus “it’s tight and painful.”
Test 3: History and Irritability Check

Purpose: Assess the timeline and pattern of your symptoms.
Equipment Needed: None (just your memory).
How to Do It
- Has your stiffness gradually worsened over several months?
- Do you have severe night pain that wakes you and is hard to settle?
- How does your shoulder feel 24 hours after gentle movement—better, same, or much worse?
What to Look For:
- Slow progression, severe night pain, and high irritability = frozen shoulder pattern.
- Shorter timeline + position-specific pain + improvement with movement = stiffness pattern.
Tip: True frozen shoulder typically develops over months and follows predictable phases (freezing, frozen, thawing).
Free That Frozen Shoulder
The key to solving shoulder stiffness is understanding what you’re actually dealing with. If your assisted movement is much better than active movement and you feel more tightness than a hard block, you likely have a stiff shoulder that can improve quickly with the right approach.
For immediate relief, start with the exercises above and perform them daily with patience and consistency.
Ready to take the next step?
About the Author: Dr. Joey Seyforth


