Your MRI Shows a Rotator Cuff Tear – Here’s What It DOESN’T Tell You
If you’ve just received an MRI report showing a rotator cuff tear – maybe even a full-thickness tear – and your doctor has delivered the crushing news that your lifting days are over or surgery is inevitable, take a deep breath.
Here’s the good news: Your MRI is telling you only part of the story.
While your MRI captures a static snapshot of damaged tissue, it completely misses the dynamic picture of how your body moves, adapts, and can build incredible redundancy around that injury.
What most medical professionals don’t explain is how your neck stiffness, upper back mobility, shoulder blade movement, and nerve function all create a domino effect that either protects or punishes your rotator cuff. When these areas aren’t working properly, your already-compromised cuff gets overloaded with every reach, press, or lift.
However, exercising just 15-20 minutes a day doing the exercises in this article may make a difference.
Quick Reference: Your Shoulder Recovery System
Total Time: 15-20 Minutes Daily
Targets: Rotator cuff support system, shoulder blade mechanics, thoracic spine mobility
Goals: Pain reduction, functional strength building, movement confidence restoration
4 Game-Changing Exercises to Rebuild Your Shoulder
Exercise 1 – Incline Row (External Rotation + Press)
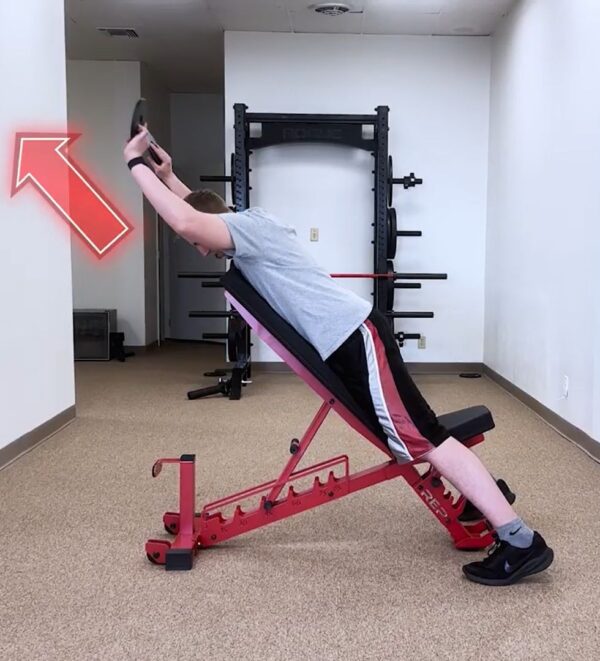
Purpose: Train pulling, cuff activation, and pressing in one smooth, shoulder-friendly movement.
Equipment Needed: Incline bench, light weights, or bodyweight.
How to Do It
- Set up on an incline bench chest-down with very light weights.
- Phase 1 (Row): Pull your elbows back to 90 degrees, engaging your upper back.
- Phase 2 (External Rotation): Rotate arms up as fists move toward the ceiling.
- Phase 3 (Press): Press hands up slightly, then reverse all steps slowly.
Sets: 2-3 sets of 6-8 slow, controlled repetitions.
Tip: Focus on feeling muscles around the back and sides of your shoulders, working – no shrugging up toward your ears
Exercise 2 – Banded Subscapularis Punch
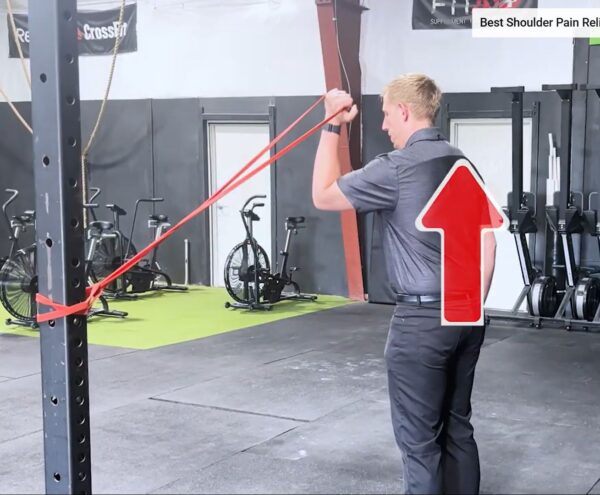
Purpose: Tos trengthen the often-neglected subscapularis muscle, which is crucial for front shoulder stability.
Equipment Needed: Resistance band, anchor point.
How to Do It
- Attach the band to a sturdy anchor at chest height.
- Stand sideways with your working arm closest to the anchor, holding the band.
- Raise your elbow at your side and punch your fist slightly up.
- Bring the bicep toward the ear without shrugging, and return with control.
Sets: 2 sets of 10 reps each side.
Tip: Think “smooth punch”, not “fast jab” – keep ribs down and don’t lean your body to cheat the range of motion.
Exercise 3: Banded Scapular Angels
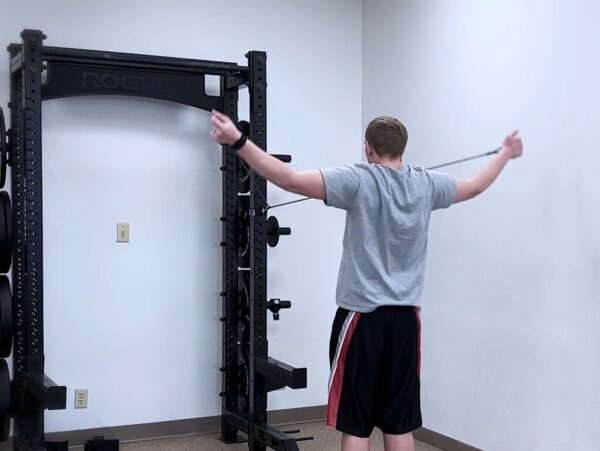
Purpose: Teach shoulder blades to move correctly and share the load with your rotator cuff.
Equipment Needed: Light resistance band
How to Do It
- Anchor band in front of you at chest height.
- Hold the band with both hands, arms straight, and walk back to create light tension.
- Pull hands back to pockets, then slowly move arms out into a Y-shape.
- End with biceps near ears, return with control.
Sets: 2 sets of 8-10 controlled repetitions.
Tip: Focus on feeling your shoulder blades tipping back and rotating upward; keep your neck relaxed to avoid compensatory shrugging.
Exercise 4: Shoulder Taps
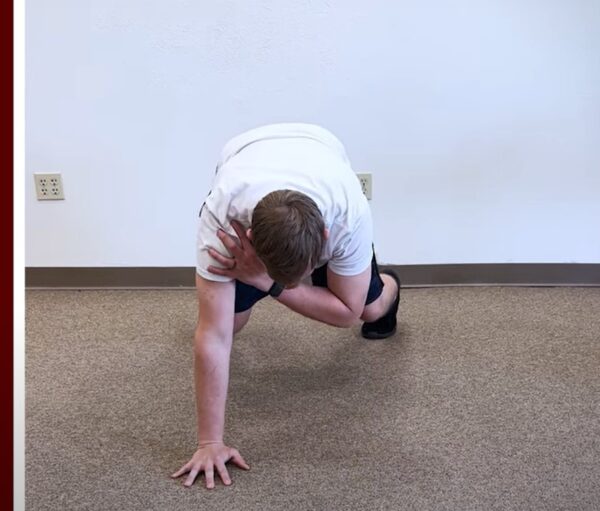
Purpose: Improve closed-chain stability to support body weight confidently.
Equipment Needed: None (bench or counter for modifications).
How to Do It
- Get into a push-up position (or place your hands on a bench/counter if it’s too challenging).
- Spread feet wider for increased stability.
- Shift weight slightly and tap the opposite shoulder with one hand.
- Switch sides while keeping the torso as still as possible.
Sets: 2 sets of 8-10 taps per side.
Tip: Quality beats speed – start slow with minimal hip movement rather than rushing through sloppy reps.
Reading the Signs of Progress
Stay within the pain guidelines if you can perform exercises like those outlined above. And take note of gradual improvements in strength and confidence over 2-4 weeks, that’s powerful evidence your shoulder has significantly more capacity than your MRI suggests.
Beyond the Scare Tactics
Don’t be afraid if your MRI results have you thinking, “I’m finished” or “I’ll never lift again.” Remember that tears are real, but so is your body’s remarkable ability to adapt and build stronger support systems around damaged areas. Your MRI doesn’t write your comeback story – it’s written by how comprehensively you address all five systems affecting your shoulder function.
Complete success requires more than just these four exercises. If you’re ready to take control of your shoulder health and build a bulletproof comeback plan, book a session below!


")