
5 Bulletproof Exercises for Rotator Cuff Pain (Even With a Tear)
You’re staring at the MRI report, and the words “rotator cuff tear” jump off the page. Your mind immediately goes to surgery, long recovery times, and giving up the activities you love. A huge number of people have rotator cuff tears that show up on imaging with zero pain.
If you’ve been told rest, ice, and basic banded exercises are the answer, but you’re still stuck in the same flare-up cycle, this article is for you. We’re going to show you a system that builds real, functional stability to get you out of pain, often without surgery.
In just a few minutes a day, you can start teaching your shoulder to be strong and stable again, no matter what your MRI says.
Quick Reference Guide
- Total Time: 15 Minutes
- Targets: Rotator Cuff, Shoulder Blade Stabilizers, Thoracic Spine, Core
- Goals: Reduce Shoulder Pain, Improve Dynamic Stability, Build Functional Strength & Endurance
The 5 Exercises
Exercise 1: Crab Rocks
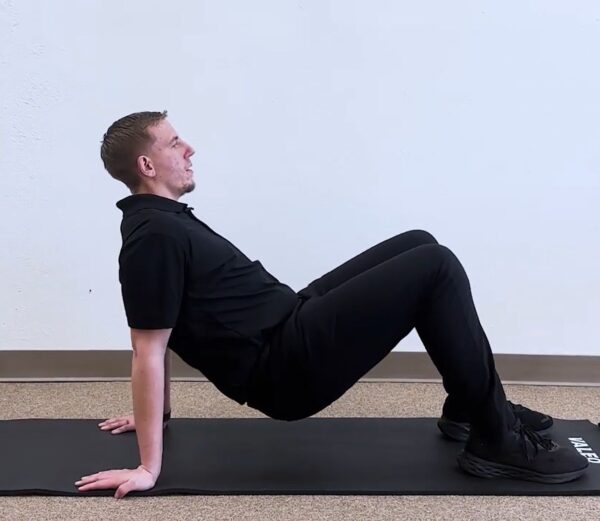
Purpose: To mobilize and strengthen the shoulder into extension, a range of motion that is often stiff and weak in people with rotator cuff issues.
Equipment Needed: None.
How to Do It
- Sit on the floor with your knees bent while you place your feet flat on the ground.
- Plant your hands on the floor behind you, fingers pointing away or to the sides, whichever is more comfortable.
- Press through your hands and feet to lift your hips into a reverse tabletop position.
- From here, gently and slowly rock your body forward and backward, allowing your shoulders to move through a dynamic range of motion.
Sets: 2 sets of 8 rocks
Tip: Focus on the controlled rocking motion to teach your cuff to create stability in a dynamic, loaded position.
Exercise 2: Banded Kettlebell Upside-Down Press
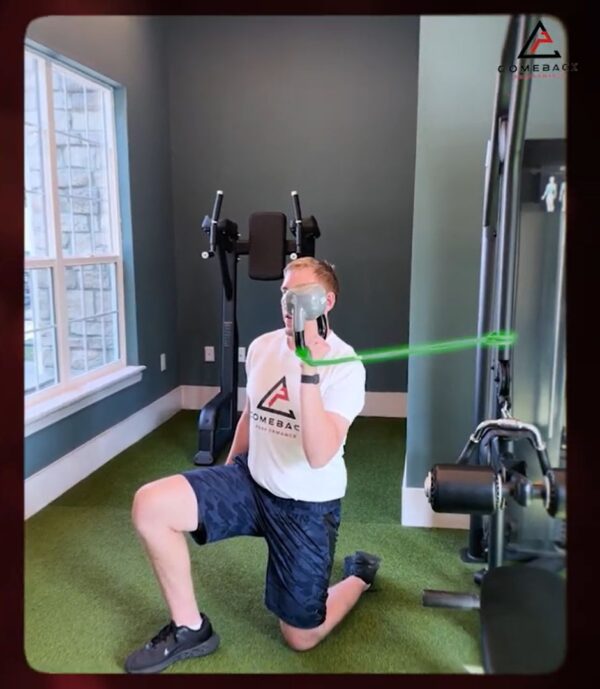
Purpose: This forces your deep rotator cuff muscles to fire and fight for stability throughout the entire pressing motion.
Equipment Needed: Light Kettlebell, Resistance Band.
How to Do It
- Anchor a resistance band to a sturdy object behind you at shoulder height. Loop the other end around the kettlebell handle.
- Hold the kettlebell by the handle, upside-down (bottoms-up), with the band pulling it slightly backward.
- Keeping your core tight and ribs down, slowly press the kettlebell straight overhead.
- Control the movement as you lower the kettlebell back to the starting position.
Sets: 2 sets of 10 reps
Tip: The instability of the kettlebell combined with the band’s pull is the magic here.
Exercise 3 – Banded Pulses
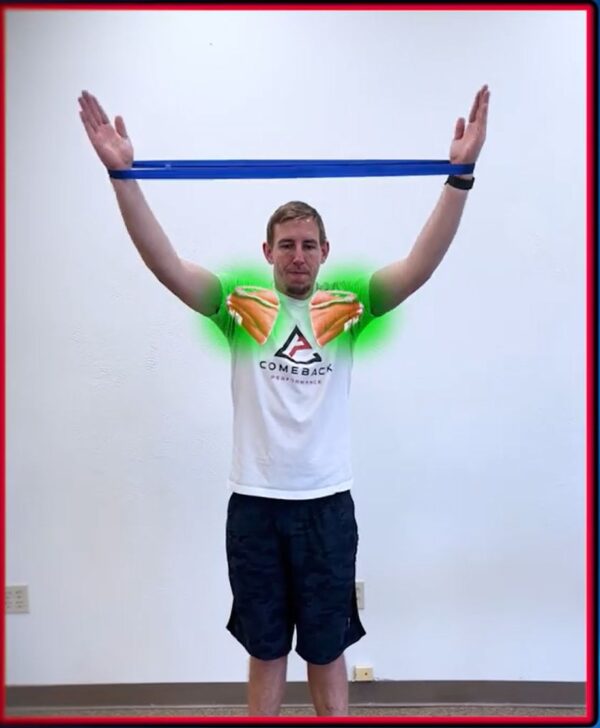
Purpose: To build the specific endurance your rotator cuff needs so it doesn’t fatigue and cause pain during repetitive movements.
Equipment Needed: Light Resistance Band
How to Do It
- Hold a resistance band with your hands about shoulder-width apart, keeping your elbows slightly bent.
- Raise your arms into flexion in front of you, maintaining tension on the band.
- As you lift your arms overhead, perform small, controlled “pulses” by pulling the band in and out.
Sets: 3 sets of 8 pulses
Tip: Ensure that the movement is controlled.
Exercise 4: Side Plank Snow Angel
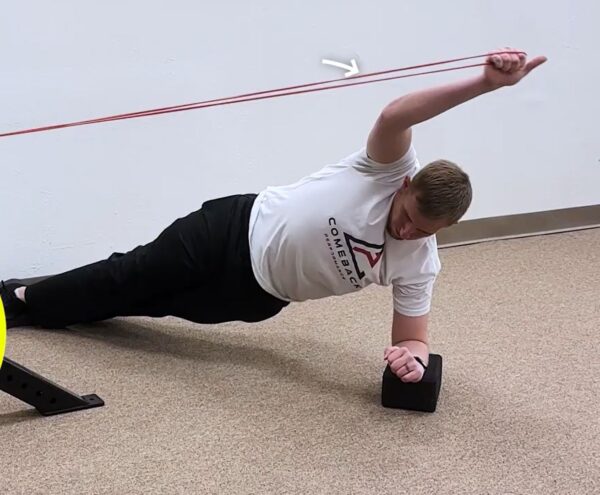
Purpose: This teaches your shoulder to stay centered and stable even while your core and body are under significant load.
Equipment Needed: Resistance Band
How to Do It
- Anchor a resistance band in front of you. Get into a side plank position on your elbow, holding the band with your top hand.
- Maintaining the plank, slowly move your top arm through a “snow angel” path—from your hip up toward the ceiling.
- Control the movement against the band’s resistance as you bring your arm back down.
Sets: 2 sets of 8 reps per side
Tip: If a full side plank is too challenging, perform the exercise from your knee.
Exercise 5: Kneeling Rotation and Press
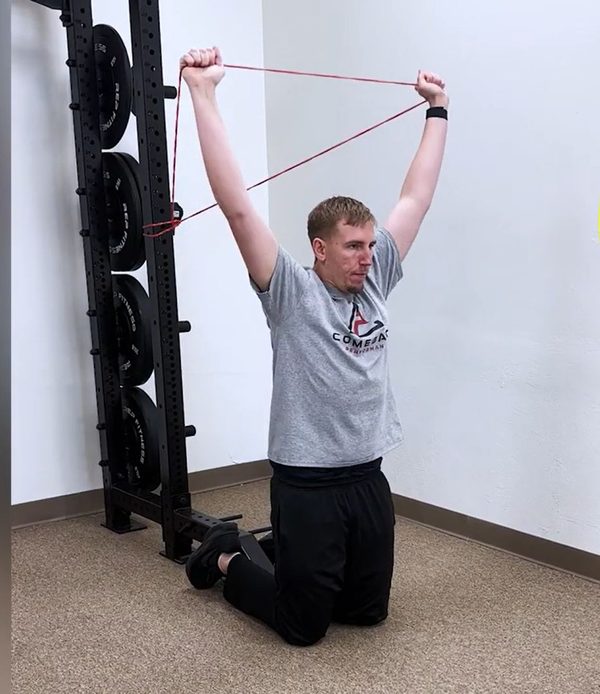
Purpose: To teach your shoulder blade and rotator cuff to work together to elevate your arm correctly, without compensating by shrugging your traps.
Equipment Needed: Resistance Band
How to Do It
- Get into a tall kneeling position with a band anchored behind you. Hold the band in both hands.
- Keeping your ribs down, rotate both shoulders outward against the band’s tension.
- While holding this external rotation, press your arms overhead.
- Slowly lower and repeat, ensuring your upper traps stay relaxed.
Sets: 3 sets of 10 reps
Tip: The key is to let the rotator cuff do the work of centering the shoulder, not the big upper trap muscles.
Your Tear Is a Snapshot, Not a Verdict
What truly determines how your shoulder feels and functions is whether the entire system around that tear can keep the ball of the shoulder centered in the socket. By practicing these five exercises we’ve shared above consistently, you will teach your shoulder to stabilize itself again.
Ready to finally fix your shoulder pain for good?
About the Author: Dr. Joey Seyforth


