
Your Rotator Cuff Tear on MRI Isn’t the Whole Story
One study out of Japan screened 664 ordinary people. They weren’t patients. Of those, 22% had a rotator cuff tear, and 65% of the people with a tear had no pain at all. Tears also became more common with age. A second study in 2010 looked at about 1,300 shoulders and found almost the same thing.
That means two out of three people walking around with a torn rotator cuff feel nothing. Your tear is real, but it isn’t automatically what’s causing your shoulder pain.
The tear on your scan and the pain in your shoulder are two different things, and they don’t match up as often as you’d think. Your shoulder also doesn’t work alone. The areas above and below it decide how much load reaches your rotator cuff in the first place.
This article covers one simple test that tells you something an MRI can’t. It explains what the rotator cuff actually does, and it gives you four exercises you can start today.
But first, let’s test your shoulder.
The Test Your MRI Can’t Give You – Gerber Lift-Off
Traditional medicine rarely screens for this. The Gerber lift-off test checks your subscapularis.
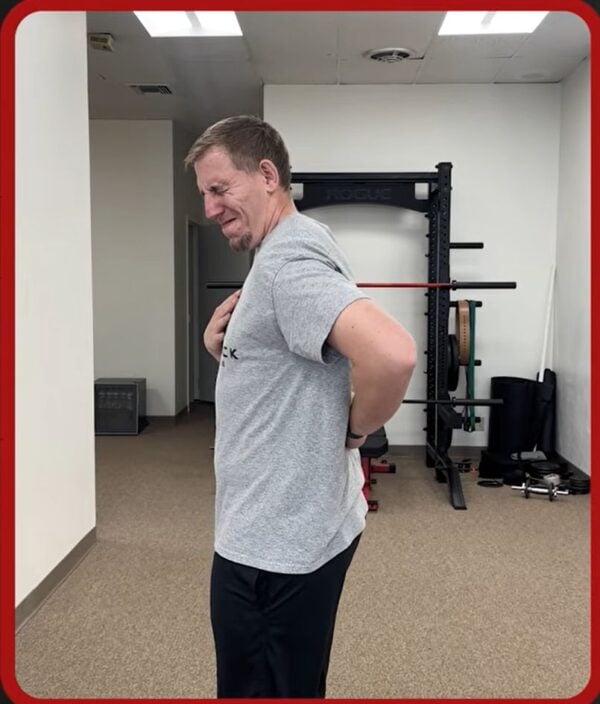
How to do it
- Put the back of your hand against your lower back, palm facing out behind you.
- Lift your hand straight off your back and hold it there.
- Watch what happens.
If you can’t lift your hand at all, if it drops right back down, or if you have to arch and twist your whole body to get it there, the test is positive for your subscapularis. Make a note of how it felt, because you’ll test it again at the end.
Quick Reference Guide
- Total Time: 4 exercises in one short session
- Targets: Rotator cuff (infraspinatus, teres minor, subscapularis), shoulder blade stabilizers, trunk
- Goals: Reduce shoulder pain, build shoulder stability and control, handle real load with confidence
The 4 Rotator Cuff Exercises to Start Today
Exercise 1: Banded Body Rotation
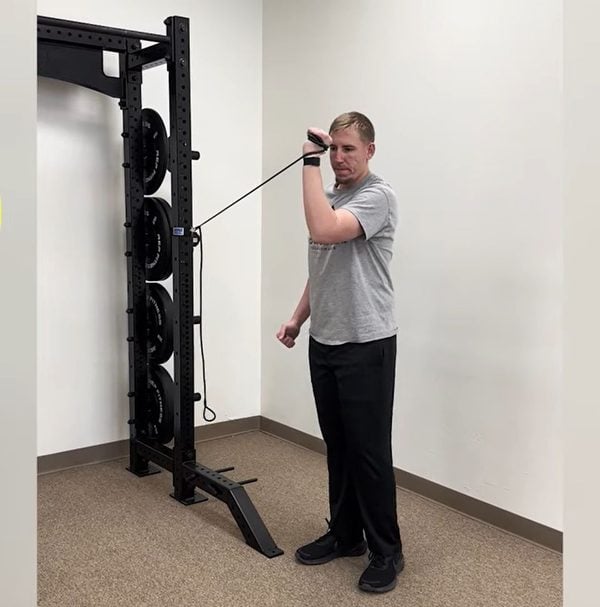
Purpose: Builds rotator cuff and shoulder blade stability while your body moves around the joint.
Equipment Needed: Resistance band, rig or anchor point
How to Do It
- Attach a band to the rig and step away until you feel tension.
- Raise your arm to 90° with your elbow bent.
- Keeping that tension, rotate your body in and out.
- Lock your shoulder blade in place so the shoulder holds center while your trunk turns.
Sets: 3 sets of 10–12 controlled reps
Tip: Let your trunk do the moving. The shoulder’s job is to stay put.
Exercise 2: Banded Extension Plus External Rotation

Purpose: Strengthens the infraspinatus and teres minor so you can press and pull safely.
Equipment Needed: Light band loop
How to Do It:
- Put your arms behind your back with a light band looped around your wrists.
- Pull your hands outward against the band. This is the external rotation part.
- Hold that tension and slowly pull your arms backward, away from your body.
- Return slowly, with no jerking.
Sets: 2–3 sets of 8–10 reps
Tip: Keep your shoulders down and don’t shrug toward your ears. You should feel this in the back of your shoulders, not your neck.
Exercise 3: Shoulder Taps
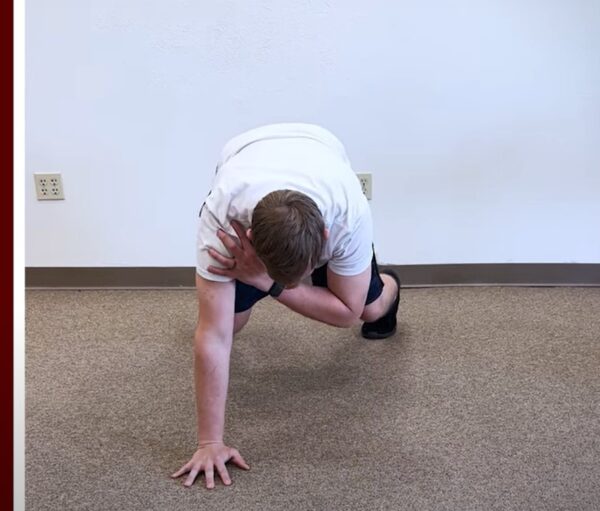
Purpose: Turns rotator cuff strength into something useful by having your shoulders support your body weight.
Equipment Needed: None (a bench or countertop if needed)
How to Do It:
- Get into a push-up plank with your feet slightly wider than hip width.
- Shift your weight to one side and tap the opposite shoulder with your free hand.
- Switch sides.
- Keep your torso completely still, with no hip swings or rocking.
Sets: 2 sets of 8–10 taps per side.
Tip: Start slow, because quality beats speed. If a floor plank is too hard, put your hands on a bench or countertop.
Exercise 4: Banded Bottom-Up Kettlebell Press
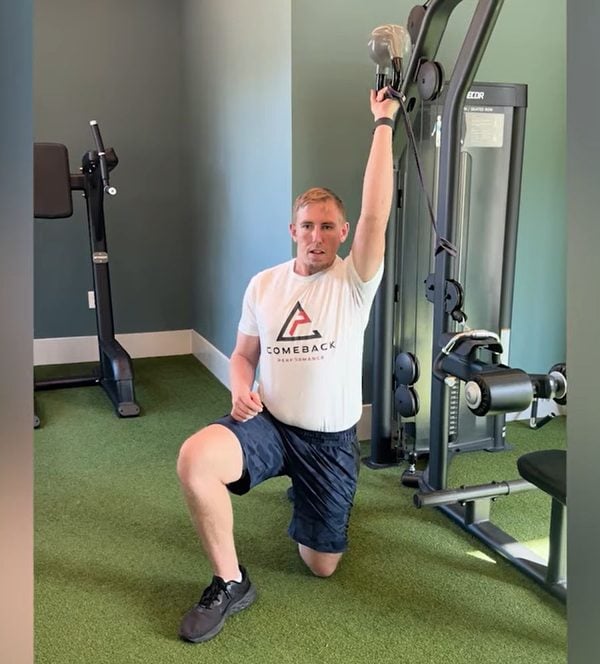
Purpose: Builds shoulder stability under real load for pressing.
Equipment Needed: Light kettlebell, resistance band
How to Do It:
- Hold a light kettlebell upside down so the bell sits above your hand, with a band pulling it backward.
- Stack your shoulder underneath it, stand tall and keep your ribs down.
- Press it up without letting the bell tip over.
Sets: 3 sets of 8 reps
Tip: This is a level-up drill. Start lighter than you think you need. If you’re early in your recovery, use a regular shoulder press for now and come back to this one later.
When you’ve finished the exercises, do the Gerber lift-off again. Can you lift your hand further, or hold it more easily? Any change is a good sign that your shoulder can improve with the right exercises and focus.
Get That Shoulder You Can Trust
A rotator cuff tear on MRI doesn’t have to be a one-way ticket to surgery. The four exercises above are a strong place to start, but they’re only one piece. Your neck, thoracic spine, shoulder blades, shoulder joint and nerves all affect how much stress lands on your rotator cuff. That’s why we do proper shoulder assessments.
About the Author: Dr. Joey Seyforth


