
A Gentle 5-Minute Routine to Get Your Frozen Shoulder Moving Again
You’ve probably heard it more than once: “Just stretch harder and break it loose.” So you grit your teeth, crank your arm into pain, and the next morning your shoulder feels angrier, tighter, and even less willing to move. A frozen shoulder isn’t something you can force open – stretching doesn’t simply “unthaw” it, and pushing aggressively into pain usually leaves the shoulder more irritated and more guarded than before.
This gentle frozen shoulder routine works on your shoulder joint, your upper back, your nervous system, and your ability to control the motion you already have, without irritating the shoulder further. It takes about five minutes, and you can do it anywhere.
Two Quick Tests Before You Start
Take these two measurements first, so you have something to compare against later.
Adduction
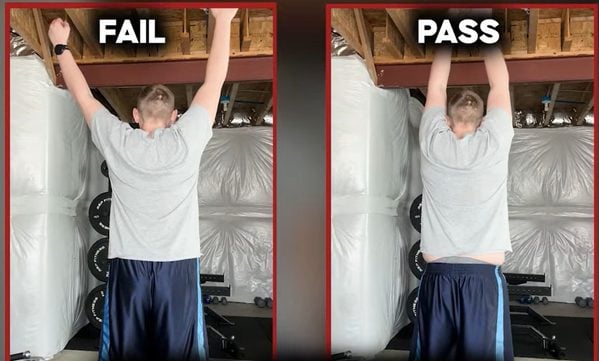
Raise your arm out to the side as high as you comfortably can. Note how high you get and whether your shoulder hikes up toward your ear.
Hand behind back:
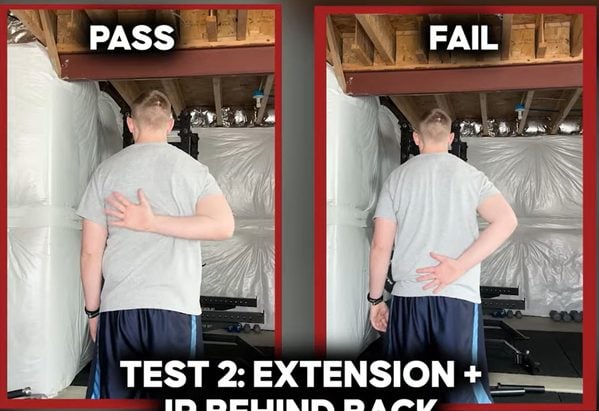
Reach up your back and note the highest landmark you can touch, whether that’s your belt, low back, bra line, or shoulder blade.
Quick Reference Guide
- Total Time: 5 Minutes
- Targets: First rib and nerves, upper back, shoulder joint, shoulder blades
- Goals: Calm the shoulder pain, restore motion, and build strength.
The 5 Exercises in Your Gentle Frozen Shoulder Routine
Exercise 1: Belt First Rib Mobilization

Purpose: To free up a stuck first rib that can squeeze the nerves passing over it and keep your shoulder muscles locked in protection mode.
Equipment Needed: Belt or long strap
How to Do It
- Loop the belt over the top of your painful shoulder so it sits just above your collarbone.
- Angle the strap down across your body toward your opposite hip and hold the end to create light, steady downward pressure.
- Keeping that pressure, bring your head down and in toward the target side, as if you’re sniffing your armpit.
- Then look up and away.
Sets: 2 sets of 8–10 reps
Tip: You should feel a gentle stretch at the top of the shoulder and side of the neck, never a sharp pinch.
Exercise 2: Sidelying Open Book

Purpose: To free up your upper back so your shoulder isn’t the only thing moving.
Equipment Needed: None
How to Do It:
- Lie on your side with your knees bent up toward your chest and stacked.
- Start with both arms straight out in front of you, palms together.
- Slowly rotate your top arm up and away, opening your chest toward the ceiling while your eyes follow your hand.
- Keep your knees down and stacked, then return with control.
Sets: 2 sets of 8–10 reps per side
Tip: Lying down is on purpose. The floor supports you, so you guard less and rotate more.
Exercise 3: Banded Inferior Mobilization
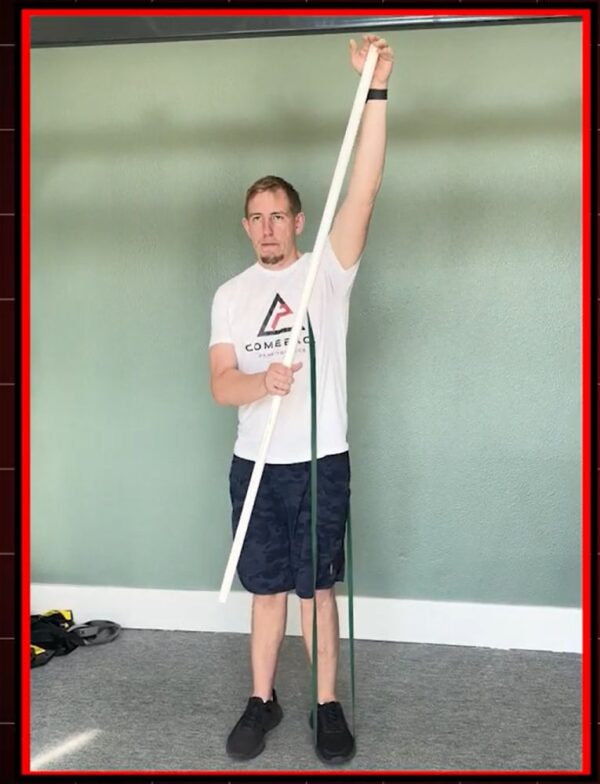
Purpose: To create space in the joint so your shoulder can move more freely.
Equipment Needed: Resistance band, plus a dowel, PVC pipe, or broomstick
How to Do It
- Step on the resistance band and place it over the top of your shoulder so it pulls downward.
- Hold the stick with both hands, with your affected hand resting on it.
- Using your good arm to do the work, guide the stiff arm straight out in front of you and up.
- Move only to the best range you can control.
Sets: 2 sets of 12 reps
Tip: Don’t force the motion into pain.
Exercise 4: Wall Slide

Purpose: To get your shoulder blade working with your arm as overhead motion returns.
Equipment Needed: A wall
How to Do It:
- Stand facing a wall with one foot in front of the other.
- Place your hands on the wall.
- Slide your arms upward while letting your chest move forward toward the wall. You should feel your shoulder blades moving up and around your rib cage.
- Go as high as you can before you hit that “frozen” wall.
Sets: 2 sets of 10 reps
Tip: Your second set should feel smoother and give you a bit more motion.
Exercise 5: Wall Extension Isometric
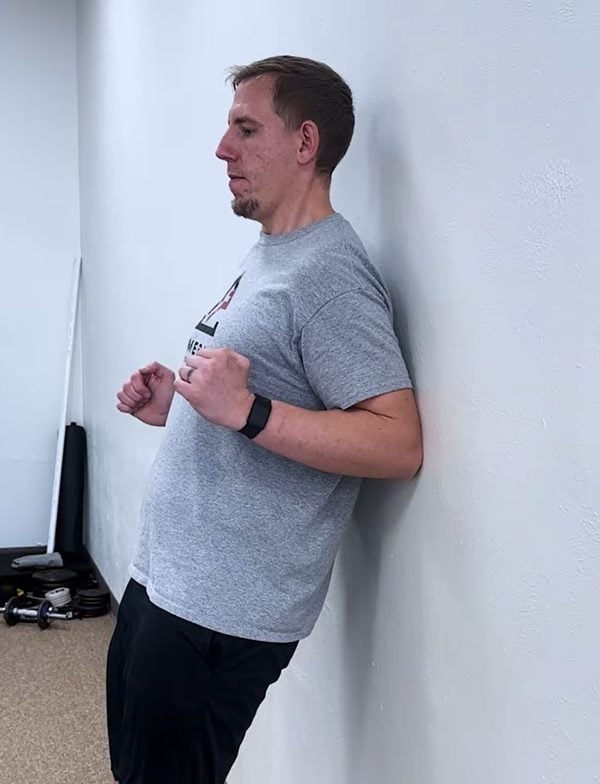
Purpose: To build strength so the shoulder feels supported. It’s one of the most tolerable ways to load an irritated shoulder.
Equipment Needed: A wall
How to Do It
- Stand with your back to the wall, feet a few inches away, elbows touching the wall.
- Press your elbows into the wall and gently lift your body away, letting your chest come forward.
- Hold for 10–15 seconds at an effort you can breathe through.
Sets: 2–3 holds
Tip: Keep your shoulders down, don’t shrug, and don’t hold your breath.
Looking Beyond the Shoulder
Lasting shoulder pain relief comes from understanding patterns in your exercises, sleep, work, driving, and gym activities. Those patterns reveal what keeps flaring your shoulder up and how to manage it. Stop guessing and start building a plan that actually fits your shoulder. And if you want a hand along the way, our team offers one-on-one online coaching and rehab.
About the Author: Dr. Joey Seyforth


