
Fix That Stubborn Knot Between Your Shoulder Blades That Won’t Go Away
Here’s the problem: that tight spot isn’t the real problem. It’s a symptom. The good news is that you’re not just stuck with it.
Got a stubborn, nagging knot between your shoulder blades that just never seems to go away? You’ve probably tried everything: rolling it on a foam roller, mashing it with a lacrosse ball, and digging into it against a wall. Sure, it might feel a little better for ten minutes, but then the tightness comes right back, leaving you frustrated.
This article will show you how to start changing the actual pattern behind the pain. We’ll use a simple, 3-exercise routine that targets the root cause.
Quick Reference Guide
- Total Time: Approx. 10 Minutes
- Targets: Upper Back (Thoracic Spine), Rib Cage, Shoulder Blades (Scapulae)
- Goals: Improve Thoracic Mobility, Build Scapular Control, Reduce Knot Pain
The Exercises
Exercise 1: Open Book
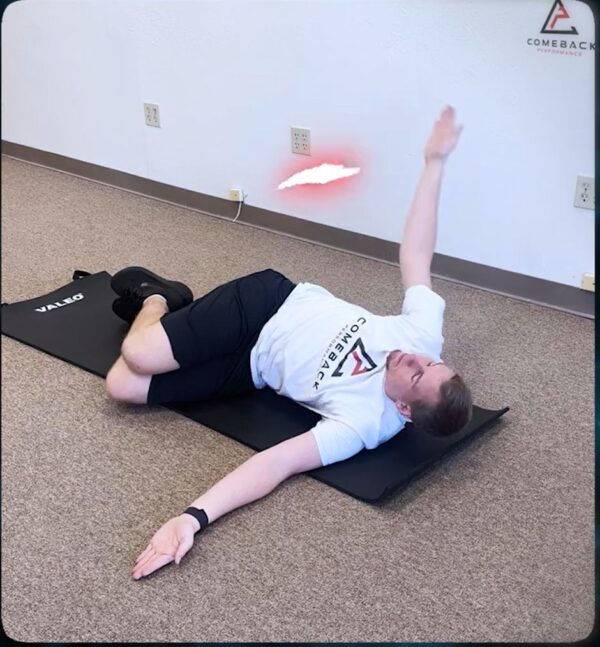
Purpose: This exercise restores essential rotation through your upper back and rib cage, so your mid-back doesn’t have to lock up and carry the load by itself.
Equipment Needed: A wall.
How to Do It
- Get into a half-kneeling position with one side of your body against a wall, keeping your hip connected to it.
- Start with both hands together in front of you. Rotate your top arm away from the wall, letting your eyes follow your hand.
- Go only as far as you can comfortably control, focusing the rotation in your upper back, not your low back or shoulder.
- Return to the starting position with control.
Sets: 2 sets of 8-10 reps per side.
Tip: Make the movement smaller and really focus on the sensation of your chest and rib cage turning. If you feel your shoulder doing all the work, fix your position.
Exercise 2: Prone W Reach
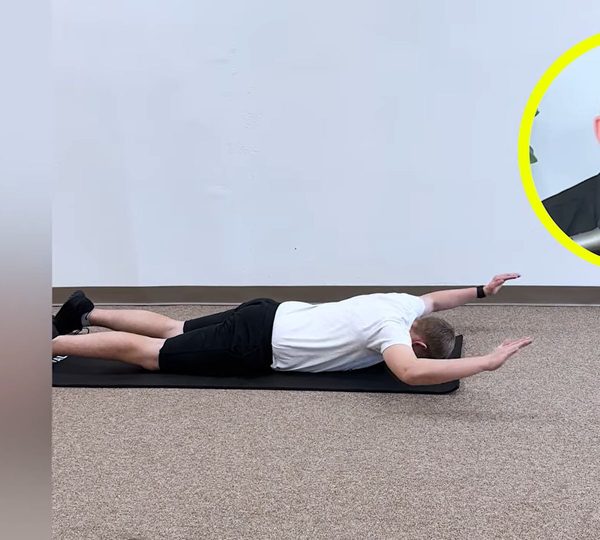
Purpose: This exercise strengthens the muscles around your shoulder blades, teaching them how to properly support and control the shoulder blade as your arm moves.
Equipment Needed: None (a mat is recommended).
How to Do It
- Lie face down with your forehead resting on the ground or a small towel. Start with your arms in a “W” position, with elbows bent and slightly below shoulder height.
- Gently pull your shoulder blades back and down slightly—think of creating a strong, wide upper back, not aggressively jamming them together.
- From this “W” position, slowly reach your arms forward into a “Y” position, keeping your arms hovering just off the floor.
- Pull your arms back into the “W” position with slow, deliberate control.
Sets: 2 sets of 8-10 slow reps.
Tip: If you feel your neck or upper traps taking over, reduce the range of motion and focus on keeping your neck long.
Exercise 3: Infinity Hovers
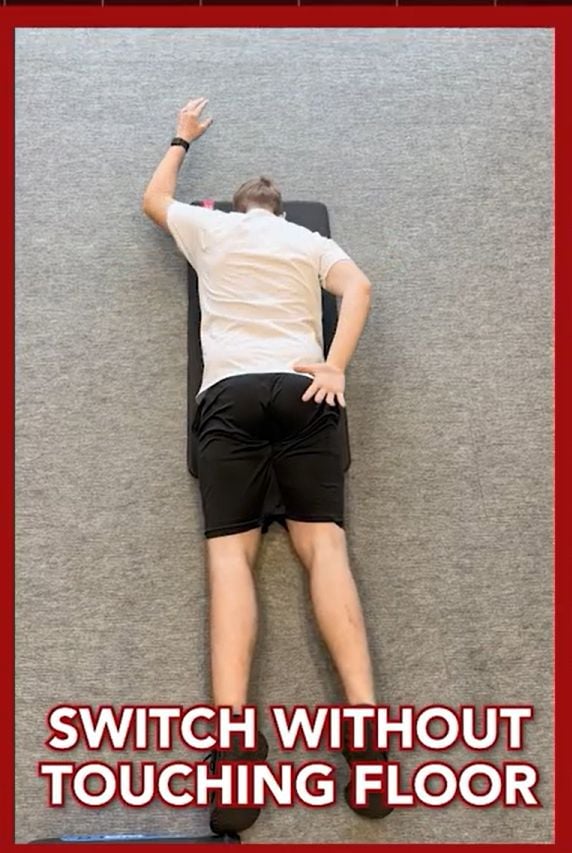
Purpose: This drill builds fine motor control and endurance across the entire upper back system.
Equipment Needed: None (a mat is recommended).
How to Do It
- Lie face down with your arms hovering slightly off the floor in a comfortable position (e.g., one arm overhead, one by your side).
- Slowly trace a large infinity sign (a figure-eight) pattern with your hands, keeping your arms hovering the entire time.
- Focus on making the motion smooth and controlled, feeling your shoulder blades move and adapt as your arms travel through the pattern.
Sets: 2 rounds of 20-30 seconds (or 3-5 slow patterns) in each direction.
Tip: If hovering both arms is too difficult, you can perform it one arm at a time or make the infinity pattern smaller.
Know Your Pain Rules
As you perform these exercises, listen to your body and use the Pain Traffic Light system. The goal is to teach your body it can move safely, not to force it through pain.
- Green Light: You feel your muscles working, a gentle stretch, or mild discomfort that feels “okay.” You can keep going.
- Yellow Light: Your symptoms increase slightly during the exercise but settle back down within a day. This is a sign to monitor the feeling, shorten the range of motion, or reduce your reps.
- Red Light: You feel sharp pain, catching, numbness, or tingling. If symptoms spike and linger into the next day, the exercise is too much for you right now..
From Quick Fix to Pain Free Shoulders
Now, retest your shoulder and see if the motion feels smoother? Is the knot less intense? Does your shoulder blade feel like it has more room to move? If you feel even a 10-20% improvement, that’s a fantastic sign! It confirms the knot wasn’t just a local tissue issue; it was connected to how your entire upper back system was moving together.
These exercises are a great starting point, but they may not be the complete solution for every person. If that knot keeps coming back, or if you also have pain with pressing, reaching, or sleeping, you may need to investigate which part of your shoulder system is involved.
About the Author: Dr. Joey Seyforth


